Hooking it all up
Everything you need is off-the-shelf. Set it up once and forget about it.
iPad to Amp
For bells, tones, and live announcements
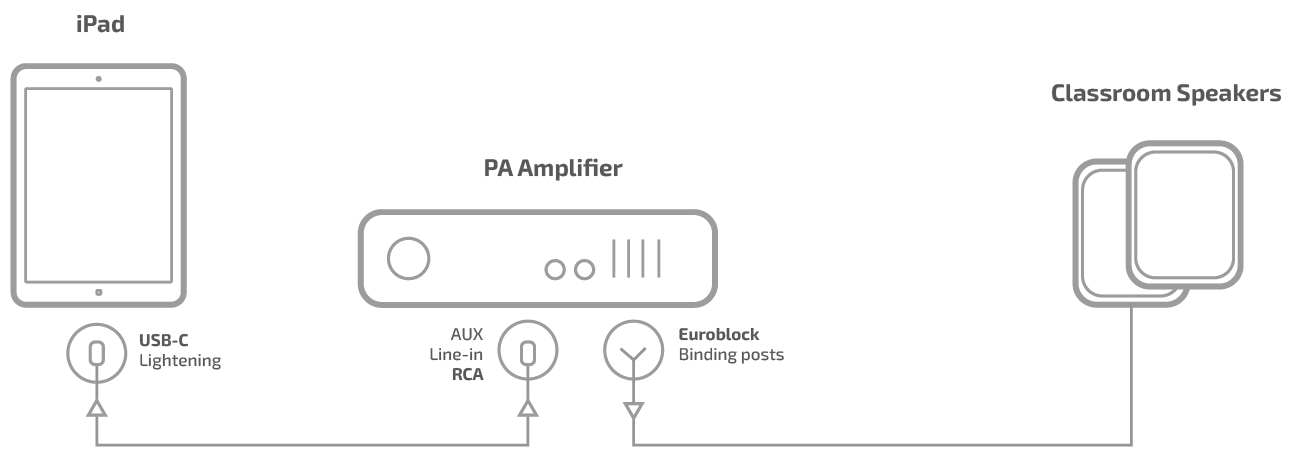
USB-C to 3.5mm adapter
Plug into the iPad's USB-C port. The Apple USB-C to 3.5mm adapter works perfectly — so do most third-party ones.
~$15 AUD3.5mm to the amp's input
Run a cable from the adapter to the amp. Use a 3.5mm TRS to dual RCA cable for RCA inputs, or a 3.5mm to 6.35mm (¼″) adapter for a mixer channel.
~$12 AUDPlug into Aux In or Line In
Not Mic In — the signal level is different and it'll sound distorted. Look for a label like Aux In, Line In, or CD In.
Set iPad volume to 75–80%
Then use the amp's input gain to dial in the level. This keeps the iPad's signal clean with headroom to spare.
USB-C

3.5mm
RCA cable
Aux In
Speakers
Adding a Microphone
Via a USB audio interface
Get a USB audio interface
A USB audio interface gives you a proper XLR mic input and a clean line output to feed the amp — far better quality than a basic dongle. You'll also need a USB-C to USB-A adapter to connect it to the iPad.
~$85–199 AUD See recommendationsConnect a headset-style microphone
Plug a standard 3.5mm TRRS headset or lapel mic into the breakout box's audio port. The box separates the mic signal from the audio out.
~$20–50 AUDRun audio output to the amp
Use the box's headphone or line-out port to run a cable to the amp's aux input — the same way you'd connect the iPad directly.
AnnounceBot handles the rest
Hold-to-talk captures from the mic input automatically. The built-in DSP — EQ and compression — applies to everything going out through the breakout box.
Mic
Breakout
USB-C
cable
Aux In